Exact Polynomials With Known Data Points
If you know only the data points, use the following procedure to run the Exact Polynomials program.
Starting the Program
To start the Exact Polynomials program:- Select { INT } from the
MATHEMATICS menu.
The program displays:
- Press { PLY }.
The program displays:
- Press { NEW }.
Entering the Data Points
When you select { NEW } from the EXACT POLYNOMIAL menu, the program displays: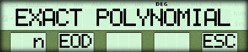
- Enter the number of data points and press { n }.
- Press { EOD }.
The program prompts you to enter the x and y values for each data point, beginning with the leftmost point.
NOTE: If you enter a point whose x-coordinate is less than or equal to the previous entry, the program rejects the entry.
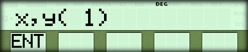
- Enter the x and y values as described below.
* Enter the x value and press the [ x~t ] key to store it in the t-register.
* Enter the y value and press { ENT }.
If you need to remove the last x and y values that were entered with { ENT }, press [ INV ] { ENT }. - Repeat step 3 until all of the x and y values are entered.
The Edit Menu
After you enter the x and y values for all the data points, the program displays an EDIT menu that allows you to change any of the values.
If you do not want to edit any values, press { EOD } and go to section on choosing the results below.
If you do want to edit a value, use the procedure that follows.
Editing Data Points
To edit the x or y value for a specified data point:- Enter the number of the data point and press { i
}.
The program displays the x value and puts the y value in the t-register. - Use the [ x~t ] key and the data entry keys to store the correct x value in the t-register and display the correct y value.
- Press { ENT } to enter the correct values.
- Repeat steps 1 through 3 for any other points you want to edit.
- Press { EOD } to continue with the program.
Choosing the Results that Are Displayed
When you select { EOD } from the EDIT menu, the program displays:

☚ Back